Draw a clear home icon in 32x32 (Ala FatCow)
How to draw a icon (size 32x32, part I)
I want to offer you a tutorial on creating icons in size 32x32 in Adobe Photoshop. This lesson will allow you to learn how to paint icons without much effort – in the end, you'll see that the icons for interfaces is not so difficult task, just need to be patient, and know the idea of working in Adobe Photoshop.
So, let's begin! In the first place, to icons not be out of size and was similar in style, you need to make a template on which basis we will draw a series of icons.
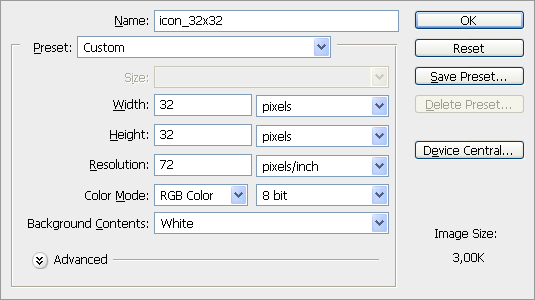
First, run Adobe Photoshop, then go to the menu File > New or press Ctrl+N and create images of size 32x32 pixel, and a resolution of 72 dpi.
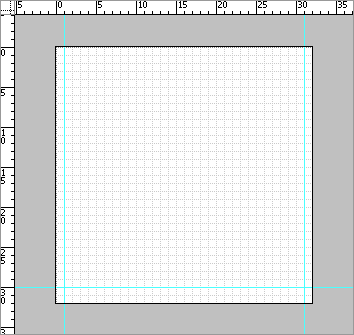
Next to our icons were clear neresnytsya edges, and they look accurately and clearly, we need to adjust the display grid (Grid), through which we will focus in the drawing because the image is composed of pixels, respectively we need to display a grid in increments of one pixel.
Go to menu Edit > Preferences > Guides, Grid and Slices, or press the keyboard combination Ctrl +K and make settings as shown in the image.

Now we have created a template, based on which we create our little masterpieces. As we have in the icons means a shadow, it must be considered. The size of the shadow I plan to make it 2 pixels below the icons and the 1st pixel on each side, therefore, the icon we get 30x30 plus shadow. For convenience let's set guidelines that will allow us to continue to see the borders between the image icons and shadows, which we took appropriate space.
As a result, our template is ready, and you can now proceed directly to the icons.
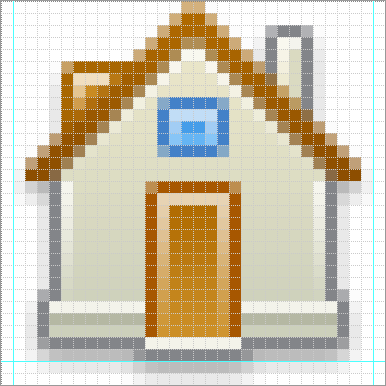
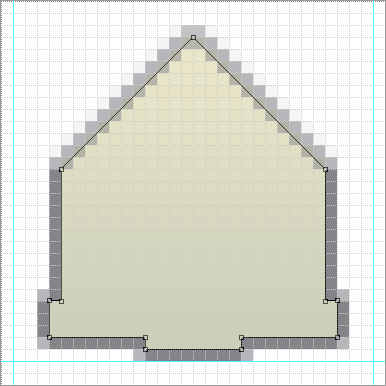
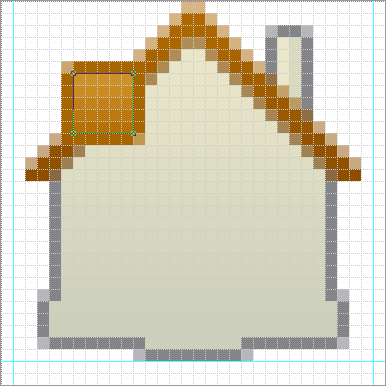
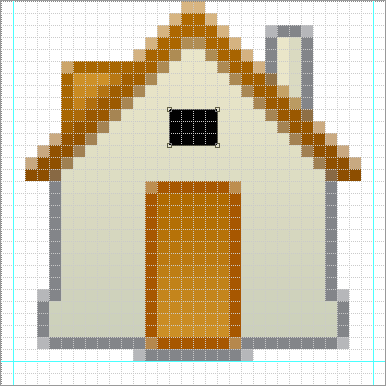
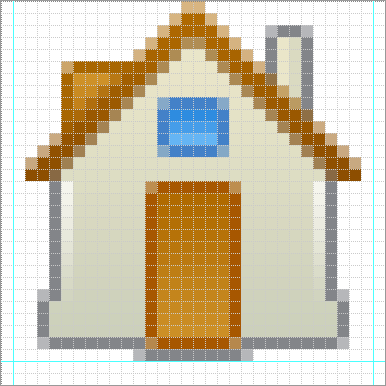
the Icon Home
To clearly see the shapes that we draw, I'll use a black fill. So with the help of the tool

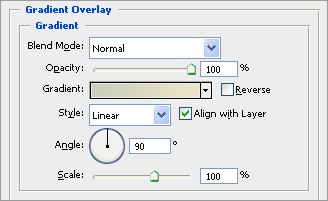
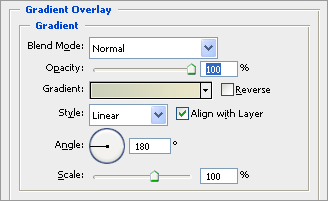
Further, to impart the desired color and contour, go to menu Layer > Layer Style > Gradient Overlay... and make a gradient from the color eae6c9 to the color cbcfba
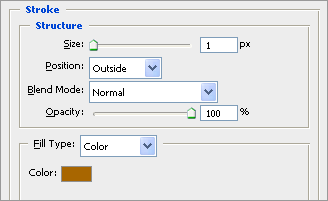
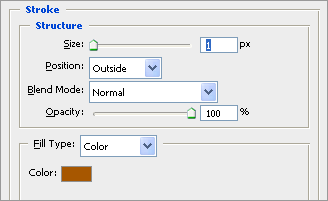
After that the form was contrasting in the future we will give this form the circuit. To do this go to menu Layer > Layer Style > Stroke... and do a line thickness of 1 pixel and with colour 868686

That's what we should be able
Now using the same tool

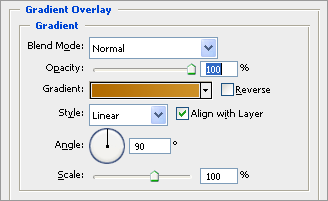
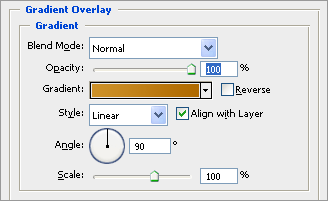
Now, let us give her the desired color, go to the menu Layer > Layer Style > Gradient Overlay... and make a gradient from the color b06a00 to the color 8c4d00.
You get this result

Well, already some outline we had, now we'll add our form details tool

Appointed on the pipe gradient fill from the color eae6c9 to the color cbcfba, only the gradient, this time directed horizontally
As before, add the contour thickness is 1 pixel and the color 868686
Get...

Now hide the tube in the background, and with the help of the tool

Assign a gradient from the color ce9128 to the color b06a00...
... and add the contour thickness is 1 pixel and the color a86600
Look...
Hide the finished item as well as the pipe into the background, and again with the help of the tool
Performed and familiar operation with a gradient from the color b06a00 to the color cd9128
... and don't forget about the line... thickness of 1 pixel, color a75700
We see the result...

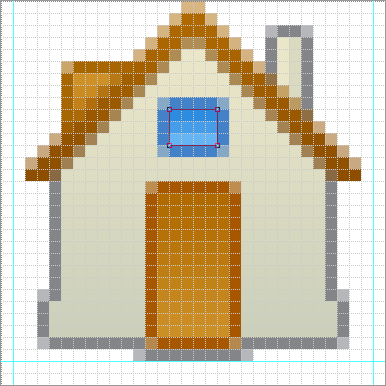
Turned out quite nice house, but we will continue to fill our icon details – click
Well, and, again, gradient – color 2e8ce0 to the color 7cc6fd
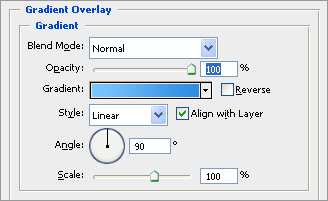
Appointed by the contour thickness is 1 pixel, and color 4381c8

Appreciate the result...
Our house is almost ready, but it looks too flat – will add volume with a glare.
Create a new layer, and using the tool
Go to menu Layer > Layer Style > Gradient Overlay... and make a gradient from the color 000000 to the color ffffff. Note setting the Blend Mode – I set the value of Screen
Should get the following output

In order to achieve the desired effect, you need to the layer to apply the following manipulations

As a result, we get this effect.
We would like to highlight under the roof. Create a new layer, and using the same tool with the

Since the gradient we have in this object is exactly as in the past, it makes sense to save time and just copy the style from the layer that we made before. To copy a style, click the right mouse button on the layer with the first reflections and in the drop-down menu, select Copy Layer Style. Now click the same right-click on the layer with the highlight under the roof, and in menu choose Paste Layer Style. So we copied the style of black-and – white gradient- left to manipulate by the layer
The result will be the following

Continue to add highlights. I want to note that every highlight needs to be on a separate layer, so it will be easier to manipulate with styles... Draw four of a highlight – each in a separate layer.
I suggest to save time – copy the style from the layer on which we did the first glare. Next, assign the copied style on each of the last four layers. As for each layer produced by appropriate manipulation of the
As a result, we should get the following
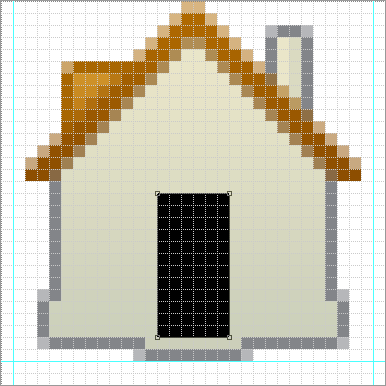
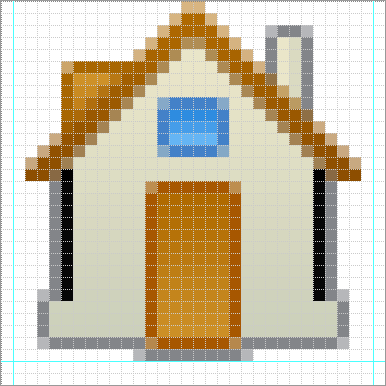
At this point, the house looks complete, but I still allow myself to put the finishing touches, emphasizing the Foundation. For this tool
Almost ready. Below add another line just with the color b5b8a3.

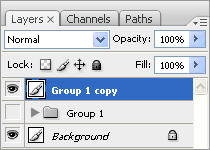
Left to our house to add shade. To do this, select all the layers, grouped them into one group, it will be our source. Next, make a copy of the group, and in this copy, compress all the layers into one, go to the menu Layers > Merge Layers (Ctrl + E). This is the layer to which we apply a shadow, and our original, we will make invisible
Then go to menu Layer > Layer Style > Drop Shadow... and appointed shadow with the following settings

And, eventually get ready to use icon!


Комментарии
Отправить комментарий